
We can easily take an old computer and turn it into our own firewall for little to nothing out of pocket.
You will need the following:
1. A suitable PC (Needs CD-ROM, USB Port Pentium II or better);
2. At least 2 Ethernet Ports (Onboard will work + Second Card, or two Cards);
3. A Blank CD/DVD;
4. USB Thumb drive, Floppy disk, or Hard Drive.
For those who don’t know much about firewalls or how they work, you will need to know the basic layout of networking designs. My example will be the standard layout of most of your in-home networks: internet access by means of a cable modem box; behind the firewall, an internal LAN connecting the workstations, file server, Smart TV’s, and VOIP adapter. There may also be a basic public wireless network separate from the rest of the home network.

Firstly, to make the CD. For this tutorial, I am using the Linux distro Devil Linux. I highly recommend getting the stable release. For those on Apple machines, you can make use of Bunzip2, which is built directly into OS X, however for those using Windows, I suggest using ZipGenius.
Within the zip file, you will see the directory and you should see the “bootcd.iso” file. Burn the image onto your blank CD/DVD with your selected burning software. If you don’t have one, or know of one, I recommend using PowerISO.
Now, let’s get the hardware going. The Devil Linux is in fact a “live” operating system, meaning that it runs directly from the CD/DVD. This is helpful as it saves the configuration on a separate thumb drive or floppy disk. Your computer will not require a hard drive to operate, but it can provide assistance in saving configurations.
For the network aspect to work properly, I have utilized 3 networking ports on my firewall. I made use of an old four port 10/100 Ethernet nic I had laying around that uses ‘tulip’ – a module under the Linux.
Hint: You will need to know the module and driver of the card(s) you are using. If you are purchasing a new card, I recommend getting a 4-port card, as it can use one PCI slot as well as the same kernel module for each of the cards.
Now we can boot up our machine once everything is connected and ready to go. Keep in mind, that if you are having issues booting from the CD drive, try swapping out the CD drive.
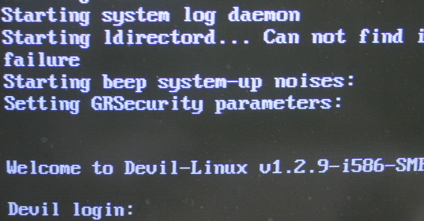
Logging into Devil Linux
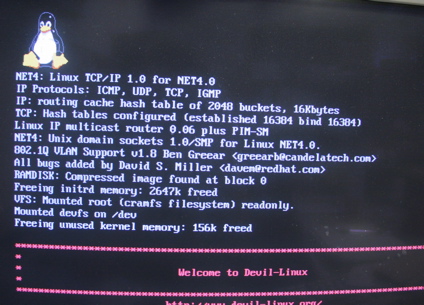
When you first start, you will see the Tux Penguin followed by the login prompt. When you get here, the user name should be ‘root’ and the password is blank, so just press enter.
Now we can configure our new firewall Devil Linux.
.
The setup is rather easy. Just use the arrow keys for navigating Up and Down, and Enter activates your highlighted item, while Spacebar selects the highlighted item.
The basic configuration menu allows you to alter your Hostname, Time Zone and other things. Once you have established your personal information, just go back and enter the Services menu.
Select Services
The services menu allows you to choose which network services you want your firewall box to be running all the time. Devil Linux, as you can see, is rather flexible. For the safety of protection and learning, I suggest enabling the SSHD and allow SSH shell connections that will come from within your network, and the NAMED so that your firewall will be able to provide you with local DNS services. If you want to be super secure, then leave them both off and return to the main menu to enter the Network menu when you are done.
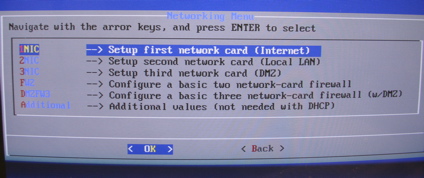
Inside your network setup, select the 1NIC option in order to configure your first network card (nic).
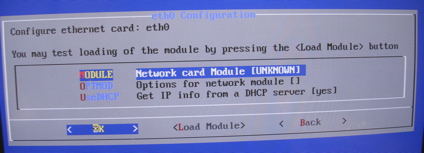
Your first networking interface is called “eth0”. This will be the port where you connect from your DSL/Cable modem. Once done, connect your DSL box or cable modem directly to it. Now, enter the module menu option.
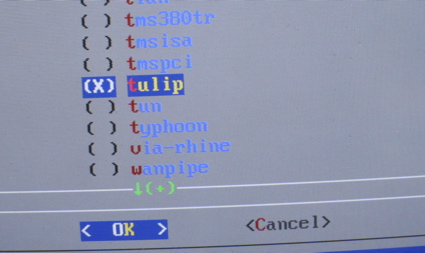
Navigate the never-ending list of modules, and make use of the spacebar to select the module you desire. In your case, select the tulip option and select “OK.”
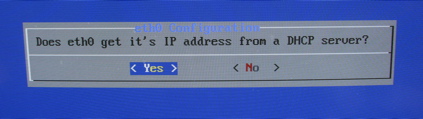
At the eth0 menu enter the DHCP option, selecting either yes or no. If you select ‘No’ then you’ll have to enter the IP address manually. If you happen to have a static IP address that is provided by your ISP, you will need to enter the information on the next screen. Otherwise, for those who wish to use the “automatic” IP address information, click ‘Yes’ and then return to the Networking menu. From there you can dive into the 2NIC menu selection.
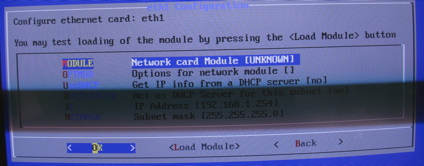
The second NIC is known as “eth1”. Go through the process and select the module as we did in the first setting; even if you are using the same nic. This is the networking port in which we will connect to our Ethernet switch, hub and workstation, with the use of a crossover cable. Using the standard address is completely fine. If you wish to alter those settings, you can do so.
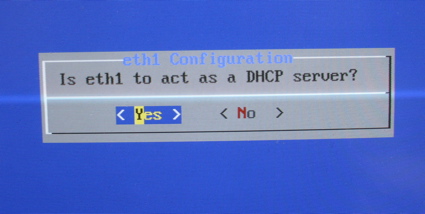
If you would like to provide a network address by means of the DHCP to the local Ethernet network, click ‘Yes’. Do the same for your 3NIC and configure your eth2.
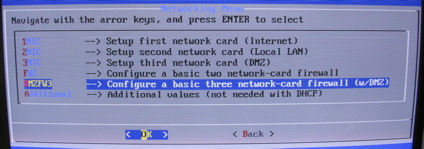
When coming out of the box, Devil Linux doesn’t have any firewall rules established. We will need to select the “DMZ3FW” if we are using 3 networking ports, otherwise, just use the FW2 for those who are using 2 networking ports. Both will install the basic firewall rule settings and use either 2 ports or 3, depending upon your setup.
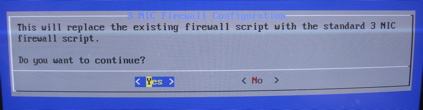
Regardless of the option you select, you will still see the screen ask if you want to replace the existing firewall script. Click “Yes” to continue, and then return to the main menu again.
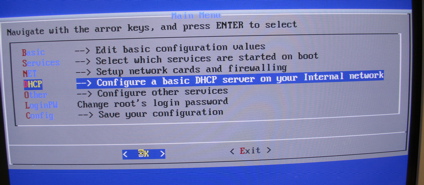
If you have opted in to provide a dynamic IP address on your LAN, you can adjust the settings manually from the DHCP option back at the main menu. By default, however, it will automatically provide you with 20 IP’s for dynamic hosts from the bottom of the IP range.
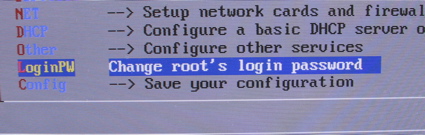
Now that you have your new firewall setup, use the LoginPW option located in the main menu to set a new password for added security.
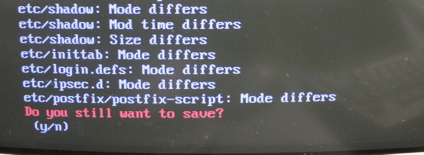
And finally, we will need to save our configurations. We can do this through the main menu, or simply typing in “save-config” at the command prompt. When we save our configurations, the system will compare new configurations to the old ones and prompt you to overwrite them. You must save these configurations after you have changed something on your new firewall, otherwise, when you reboot, you’ll lose everything you have already done.
And now you have your own home-built firewall device that you can use to keep your home network safe from hackers and viruses – or try to help it out anyway.
This article (How to Build Your Own Firewall Using Your Old Computer) is a free and open source. You have permission to republish this article under a Creative Commons license with attribution to the author and AnonHQ.com.
Supporting Anonymous’ Independent & Investigative News is important to us. Please, follow us on Twitter: Follow @AnonymousNewsHQ


